The basic essentials of removing an engine
Engines belong in an engine bay, but sometimes it’s just gotta come out. Whether it’s for a rebuild, or an upgrade to something more powerful; removing an engine is well within your reach. Here we will talk about some of the tools and equipment (such as engine cranes and engine stands) necessary to get the job done safely and properly.
Before you jump into removing the engine, it’s worth spending a little on a workshop manual to suit your vehicle, and spending a few hours going through the exact procedure.
Also, our guidelines here cover removing an engine from the top, yet some engines are best removed through the bottom of the car while the vehicle is on a hoist.
What tools do I need to remove an engine?
The basic tools and equipment required will include:
- A comprehensive toolkit. This should include a full range of spanners, sockets, ratchets, extension bars, breaker bar, screwdrivers, allen keys, and a few types of pliers
- Electrical tape and marker for marking plugs and wires
- A digital camera or phone to help jog your memory later
- Drain tubs for oils and fluids
- Parts trays and storage containers for fasteners
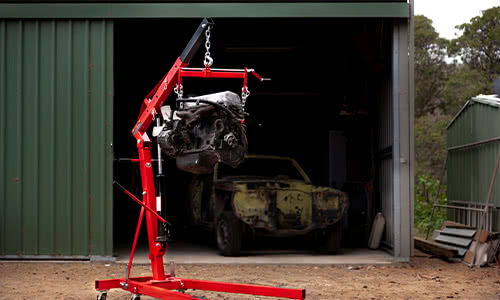
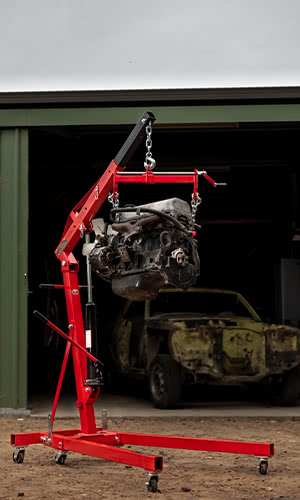
- An engine crane with engine leveller
- Engine stand

How do I remove the engine from my car
Your first task should be to disconnect the battery terminals. Wrap these in a rag and tape them up so they don’t accidentally come into contact with the battery posts.
Next, remove the bonnet from the vehicle entirely. You’ll need an extra set of hands for this.
Now, drain the radiator. The hoses can be left attached at either the radiator, or the engine – but can be removed if you need the space. Depending on the vehicle, you may need to remove the radiator as well – but removing it regardless will prevent the risk of damaging it.
The next part of the job takes the longest; disconnecting all cables, wires and hoses tying the engine to the vehicle. Take lots of pictures as you go, and wrap plugs and hoses with a piece of electrical tape which you can number, or write a tag to help you reassemble everything.
There will be larger components to remove as well. The exhaust needs to be un-bolted from the engine, the air intake must be disconnected and possibly removed; and in many cases the starter motor will need to come out.
How to use an engine crane
You’re now at the point where the engine crane must be attached. By now, the only thing holding the engine in place should be the engine mounts and the connection to the transmission. However; you don’t want the transmission to thump onto the concrete as you pull the engine out, so you’ll need to support that with axle stands.
Your engine crane is simple to set up. The boom is adjustable, but the further you extend it; the less weight it is rated to hoist. Hence it’s a good idea to keep the boom as far retracted as possible.
Ensure that all the locking pins are in place before wheeling the crane under your vehicle until the hook is over the centre of the engine. Now you can clip your engine leveller onto the crane.
How to connect an engine leveller
The engine leveller has a length of chain on each end which can be lengthened or shortened by shifting it through the locking points. You should ensure that it’s hanging level before extending the chains down to the lifting points on your engine. The lifting points are generally located on the head or block of the motor where you may find a hook or loop to attach it to; or just a threaded hole where a high tensile bolt can be attached for lifting. Take a look at your workshop manual to determine the lifting points for your vehicle.

Lifting the engine
Raise the crane until it takes up some of the weight, then unbolt the engine mounts and all of the bolts joining the transmission to the engine. Now you are ready to begin hoisting.
Raise the engine slowly, keeping an eye out for any points where it may get hung up, or parts you forgot to disconnect (most of the time you will have missed something). You may need a pry bar to wriggle the engine and transmission apart. If any of the angles don’t look quite right, crank the handle on your engine leveller to even it out.
Slow and steady wins the race here, and prevents any damage.
Now what do I do with the engine?
You can’t just leave it hanging in mid air right? That’s where the engine stand comes in handy. Wheel this up to the back of the engine, and move the adjustable arms around until they line up with some of the transmission mounting holes. In some cases, the original bolts will suffice to attach everything here, otherwise you might need to dig through the parts bin.
Once it’s securely mounted up, you can disconnect the crane and leveller from your engine. Now you’re free to move it around the workshop; or rotate it for easy access. Just don’t forget to drain that old engine oil!
*Important information* - Click here to read more about our DIY Advice Terms and Conditions.