How To Install A Dash Camera
Overview
What is a dash camera?
A dash camera (also frequently referred to as a dash cam) is a small video camera which may be mounted to your dashboard or windscreen to continuously record the view forwards and sometimes to the rear as well. Most of the time the footage will be fairly mundane, but in the event of an accident, vandalism, or theft; a dash camera can be a valuable source of evidence.
How do dash cams work?
A dash camera may be attached to the windscreen or dash with a suction cup or sticky mount. The included power cable connects to the 12 volt socket. This allows the camera to start and stop recording with your car's ignition. Footage is recorded to a memory card and can be viewed on the camera if it has a screen, on your smartphone, or pop that memory card in your computer to view and save it.
All dash cameras use loop recording and overwrite old footage once the memory card is full. Footage of an event can be locked so that it won’t be overwritten. This can be done manually on the camera or through an app; or automatically when the camera detects a sudden impact.
Why should I install a dash cam?
Here are three SUPER reasons why you should do a dash cam installation. First of all, in the event of a road accident or car park collision; evidence captured from a dash camera can help to speed up insurance claims. If the accident should end up in court, your dash cam footage could be very helpful to plead your case.
The second reason why you should install a dash camera is for safety features. Premium dash cameras often integrate driver assistance functions, safety camera updates, lane departure, and collision warnings which may be missing in your older vehicle.
The third reason is purely for fun! A dash camera can be relied upon to capture interesting or exciting moments and memories on a road trip or in your everyday commute.
How to install a dash cam?
These are just a few compelling reasons to install a dash cam, but there’s even more to consider! For a deeper dive, check out our handy article which outlines the practical uses and benefits of dash cams.
Now it’s time to look at dash cam installation, and if you’re excited to own a dash camera; you’ll be pleased to know that learning how to fit a dash cam is SUPER easy. Let’s first look at how to fit a dash cam using the included 12 volt power cable, and then how to hard wire dash cam components to get the most out of your dash camera.
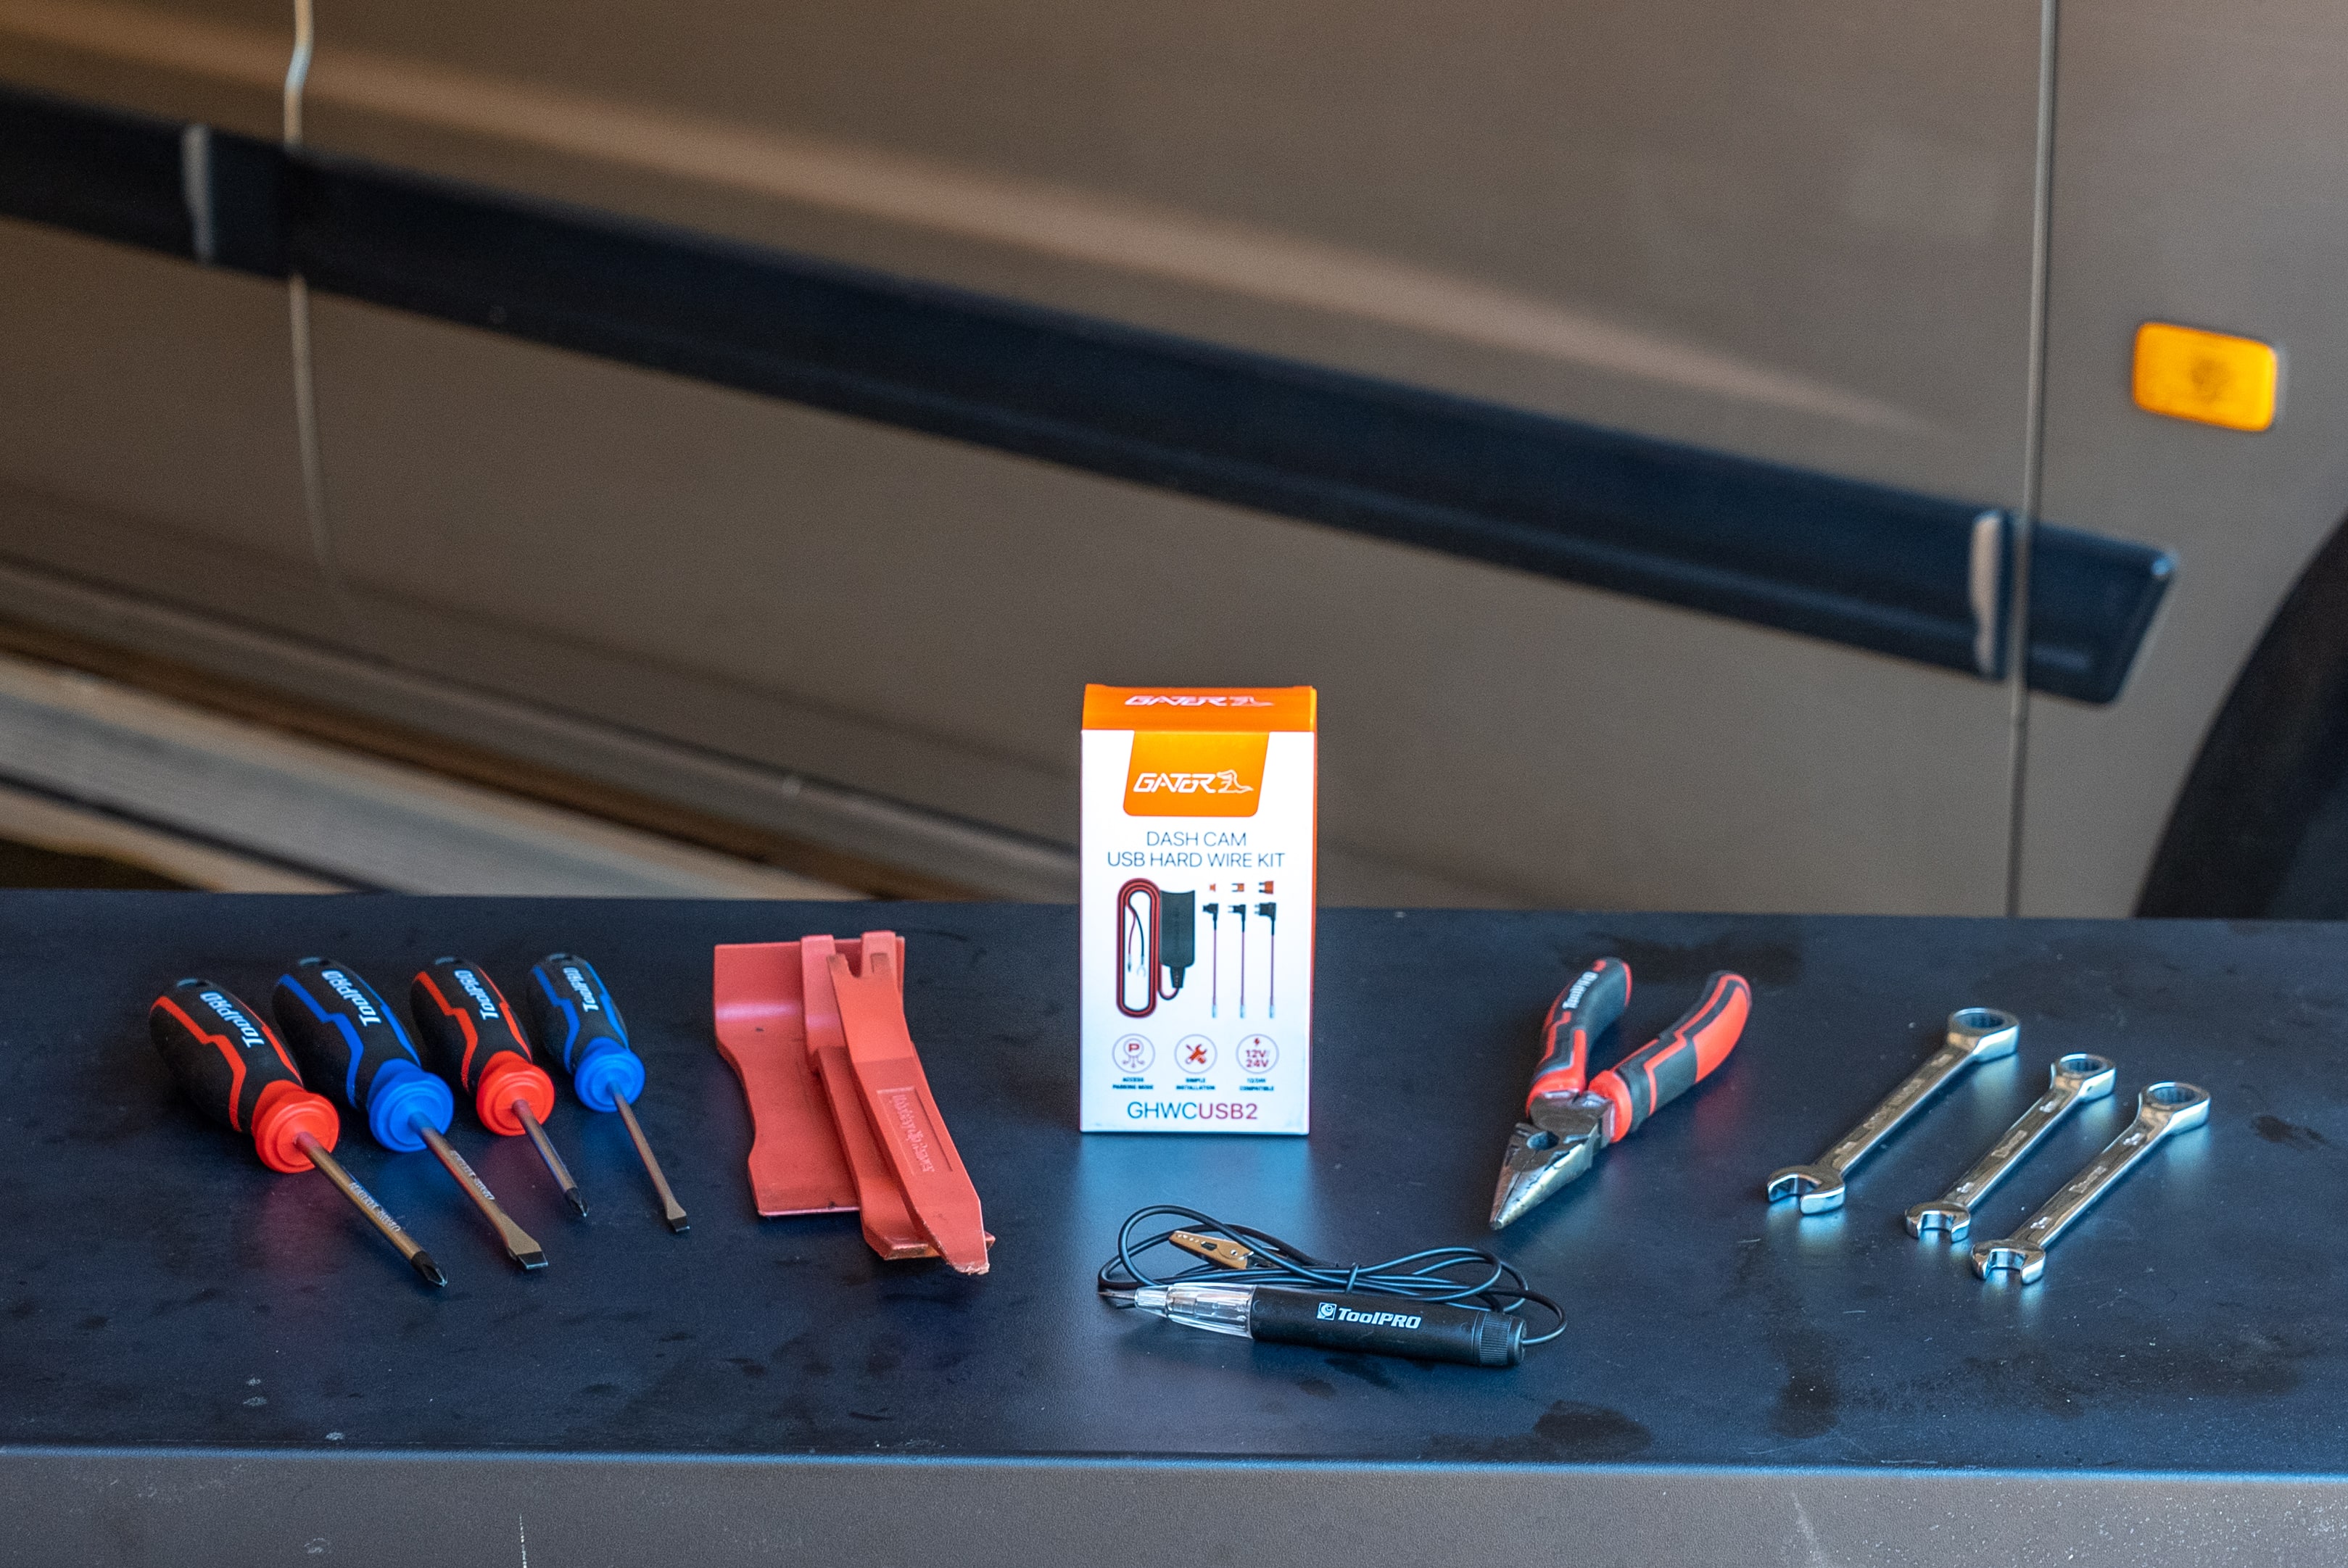
Materials & Tools
For your dash cam installation, you’ll require the following parts and tools
- A dash camera – whichever suits your needs and budget
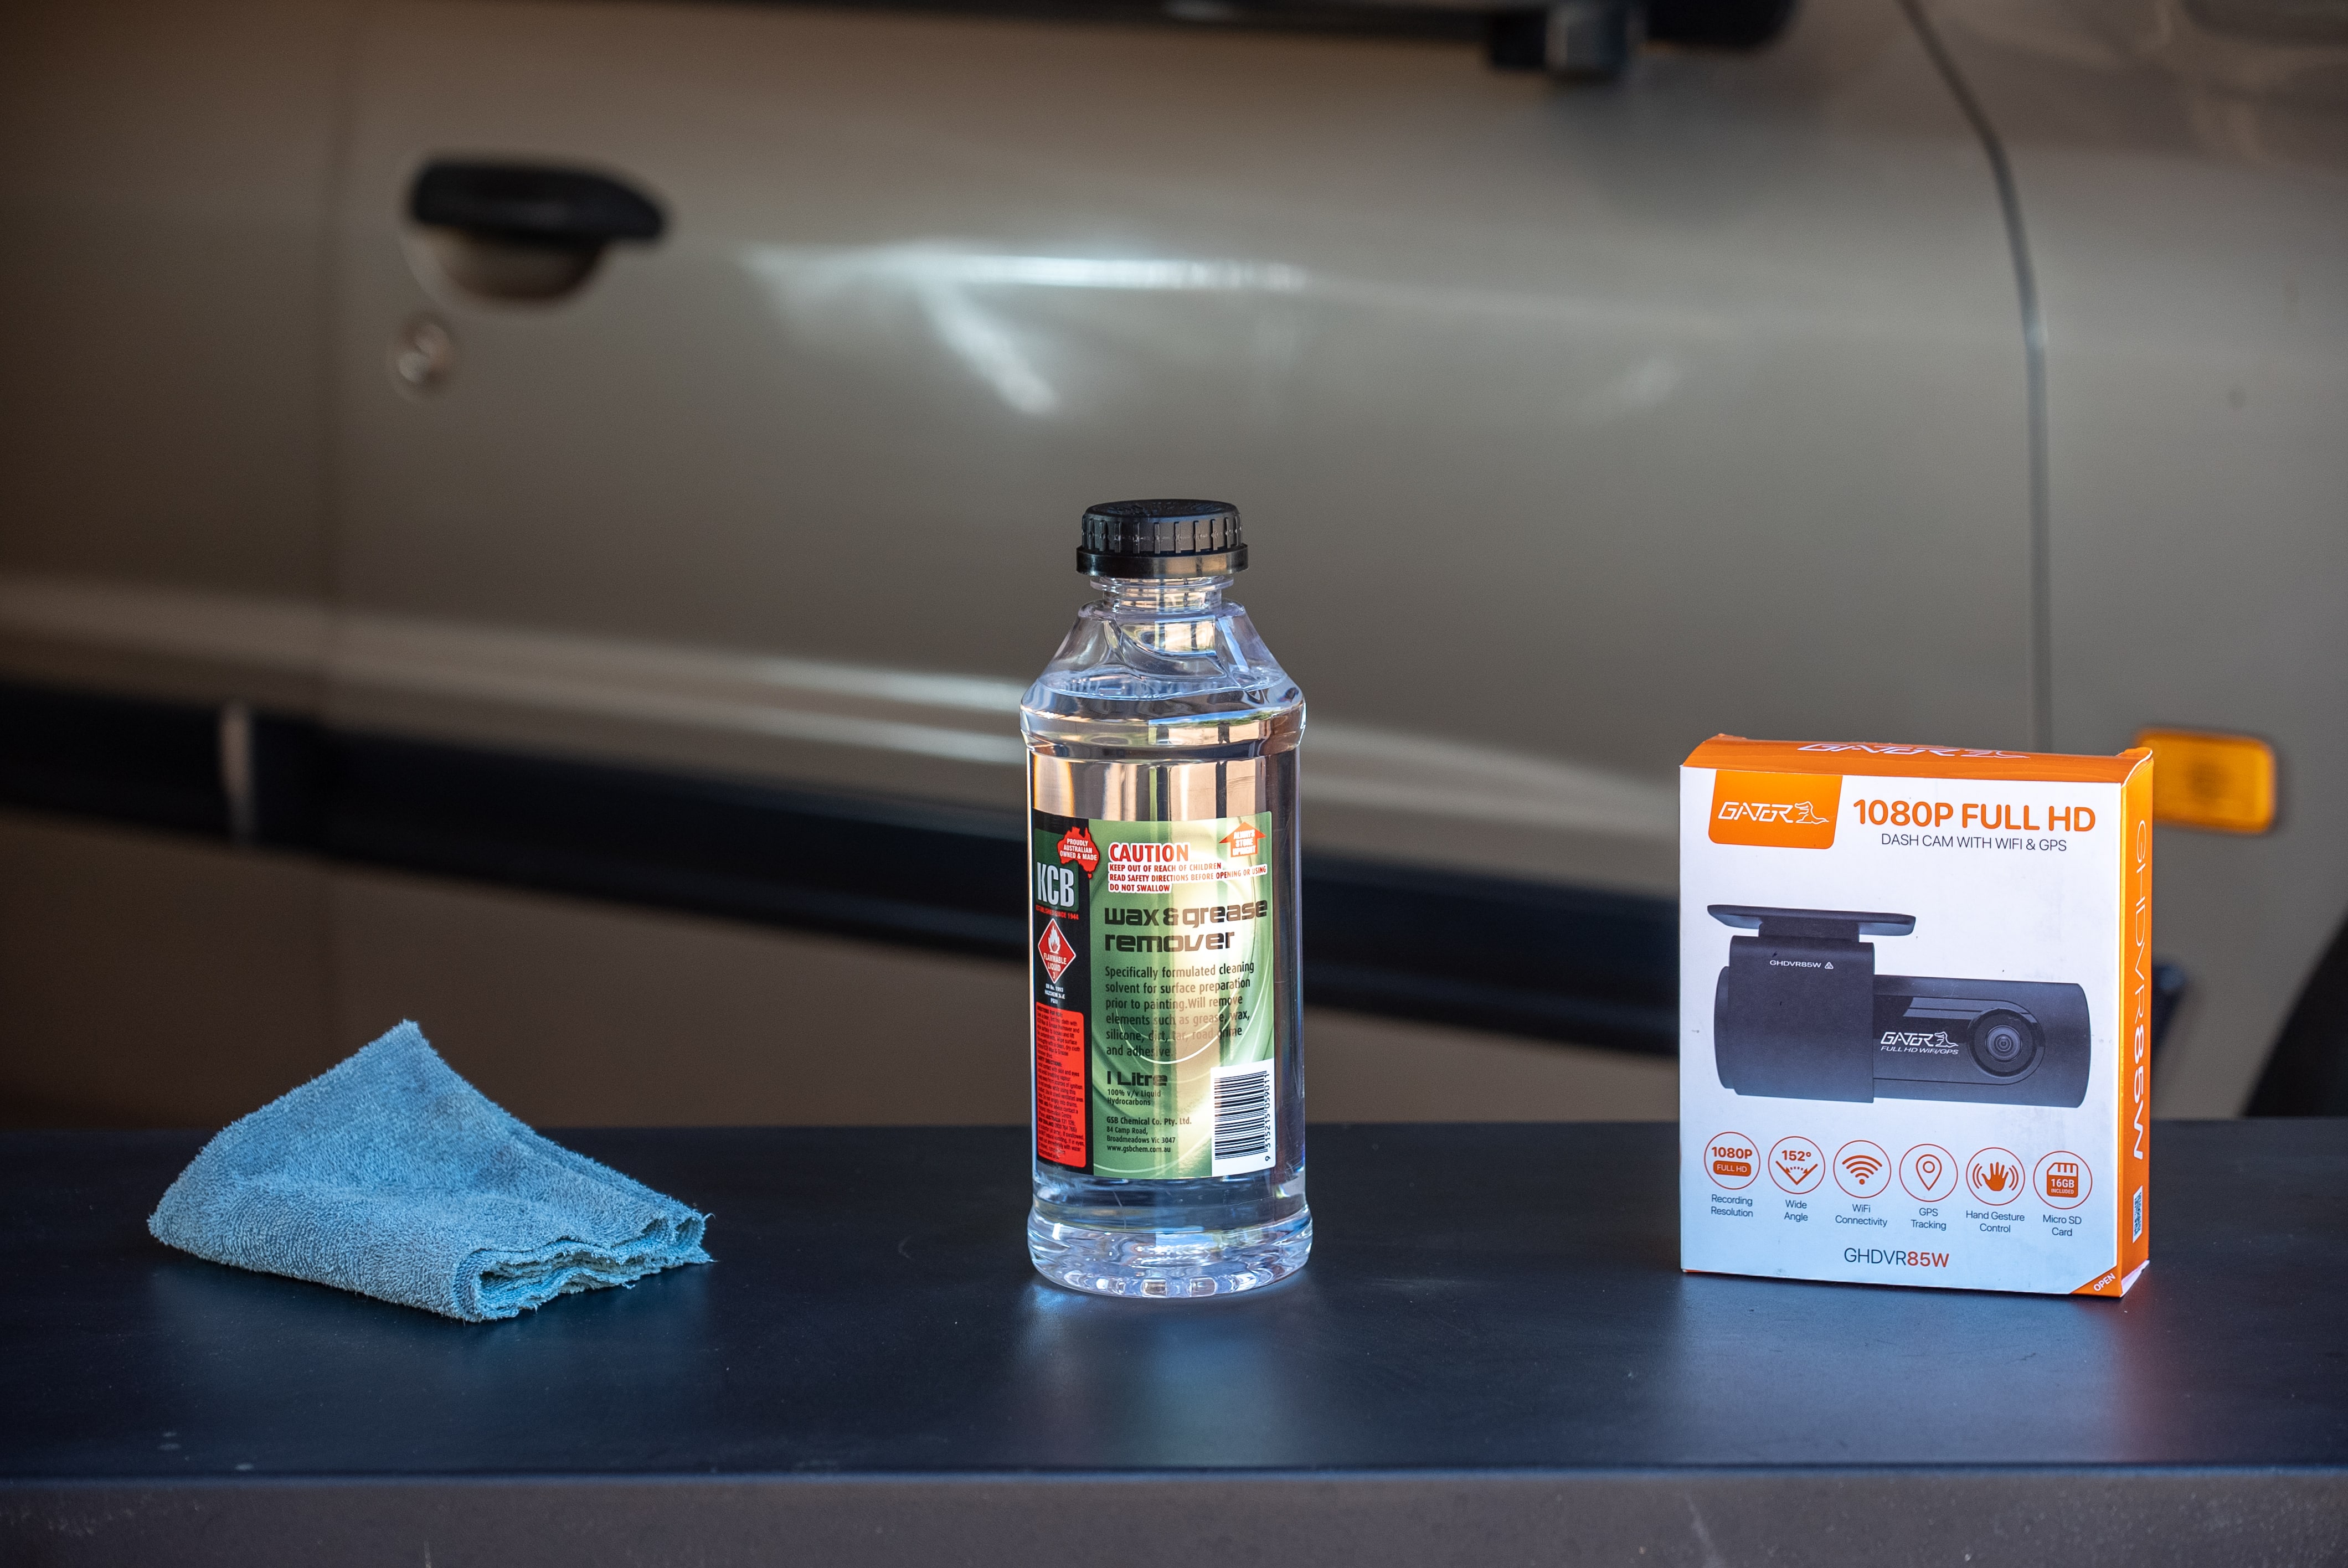
- Wax and grease remover – in a spray can or bottle
- A clean cloth – to be used with the wax and grease remover
- Hard wire kit – most dash camera brands have this as an optional accessory
- Test light – to locate a suitable hardwire point
- Long nose pliers – SUPER helpful for pulling fuses!
- Screwdrivers & trim removal kit – removing trim will help you achieve a tidier installation
Steps
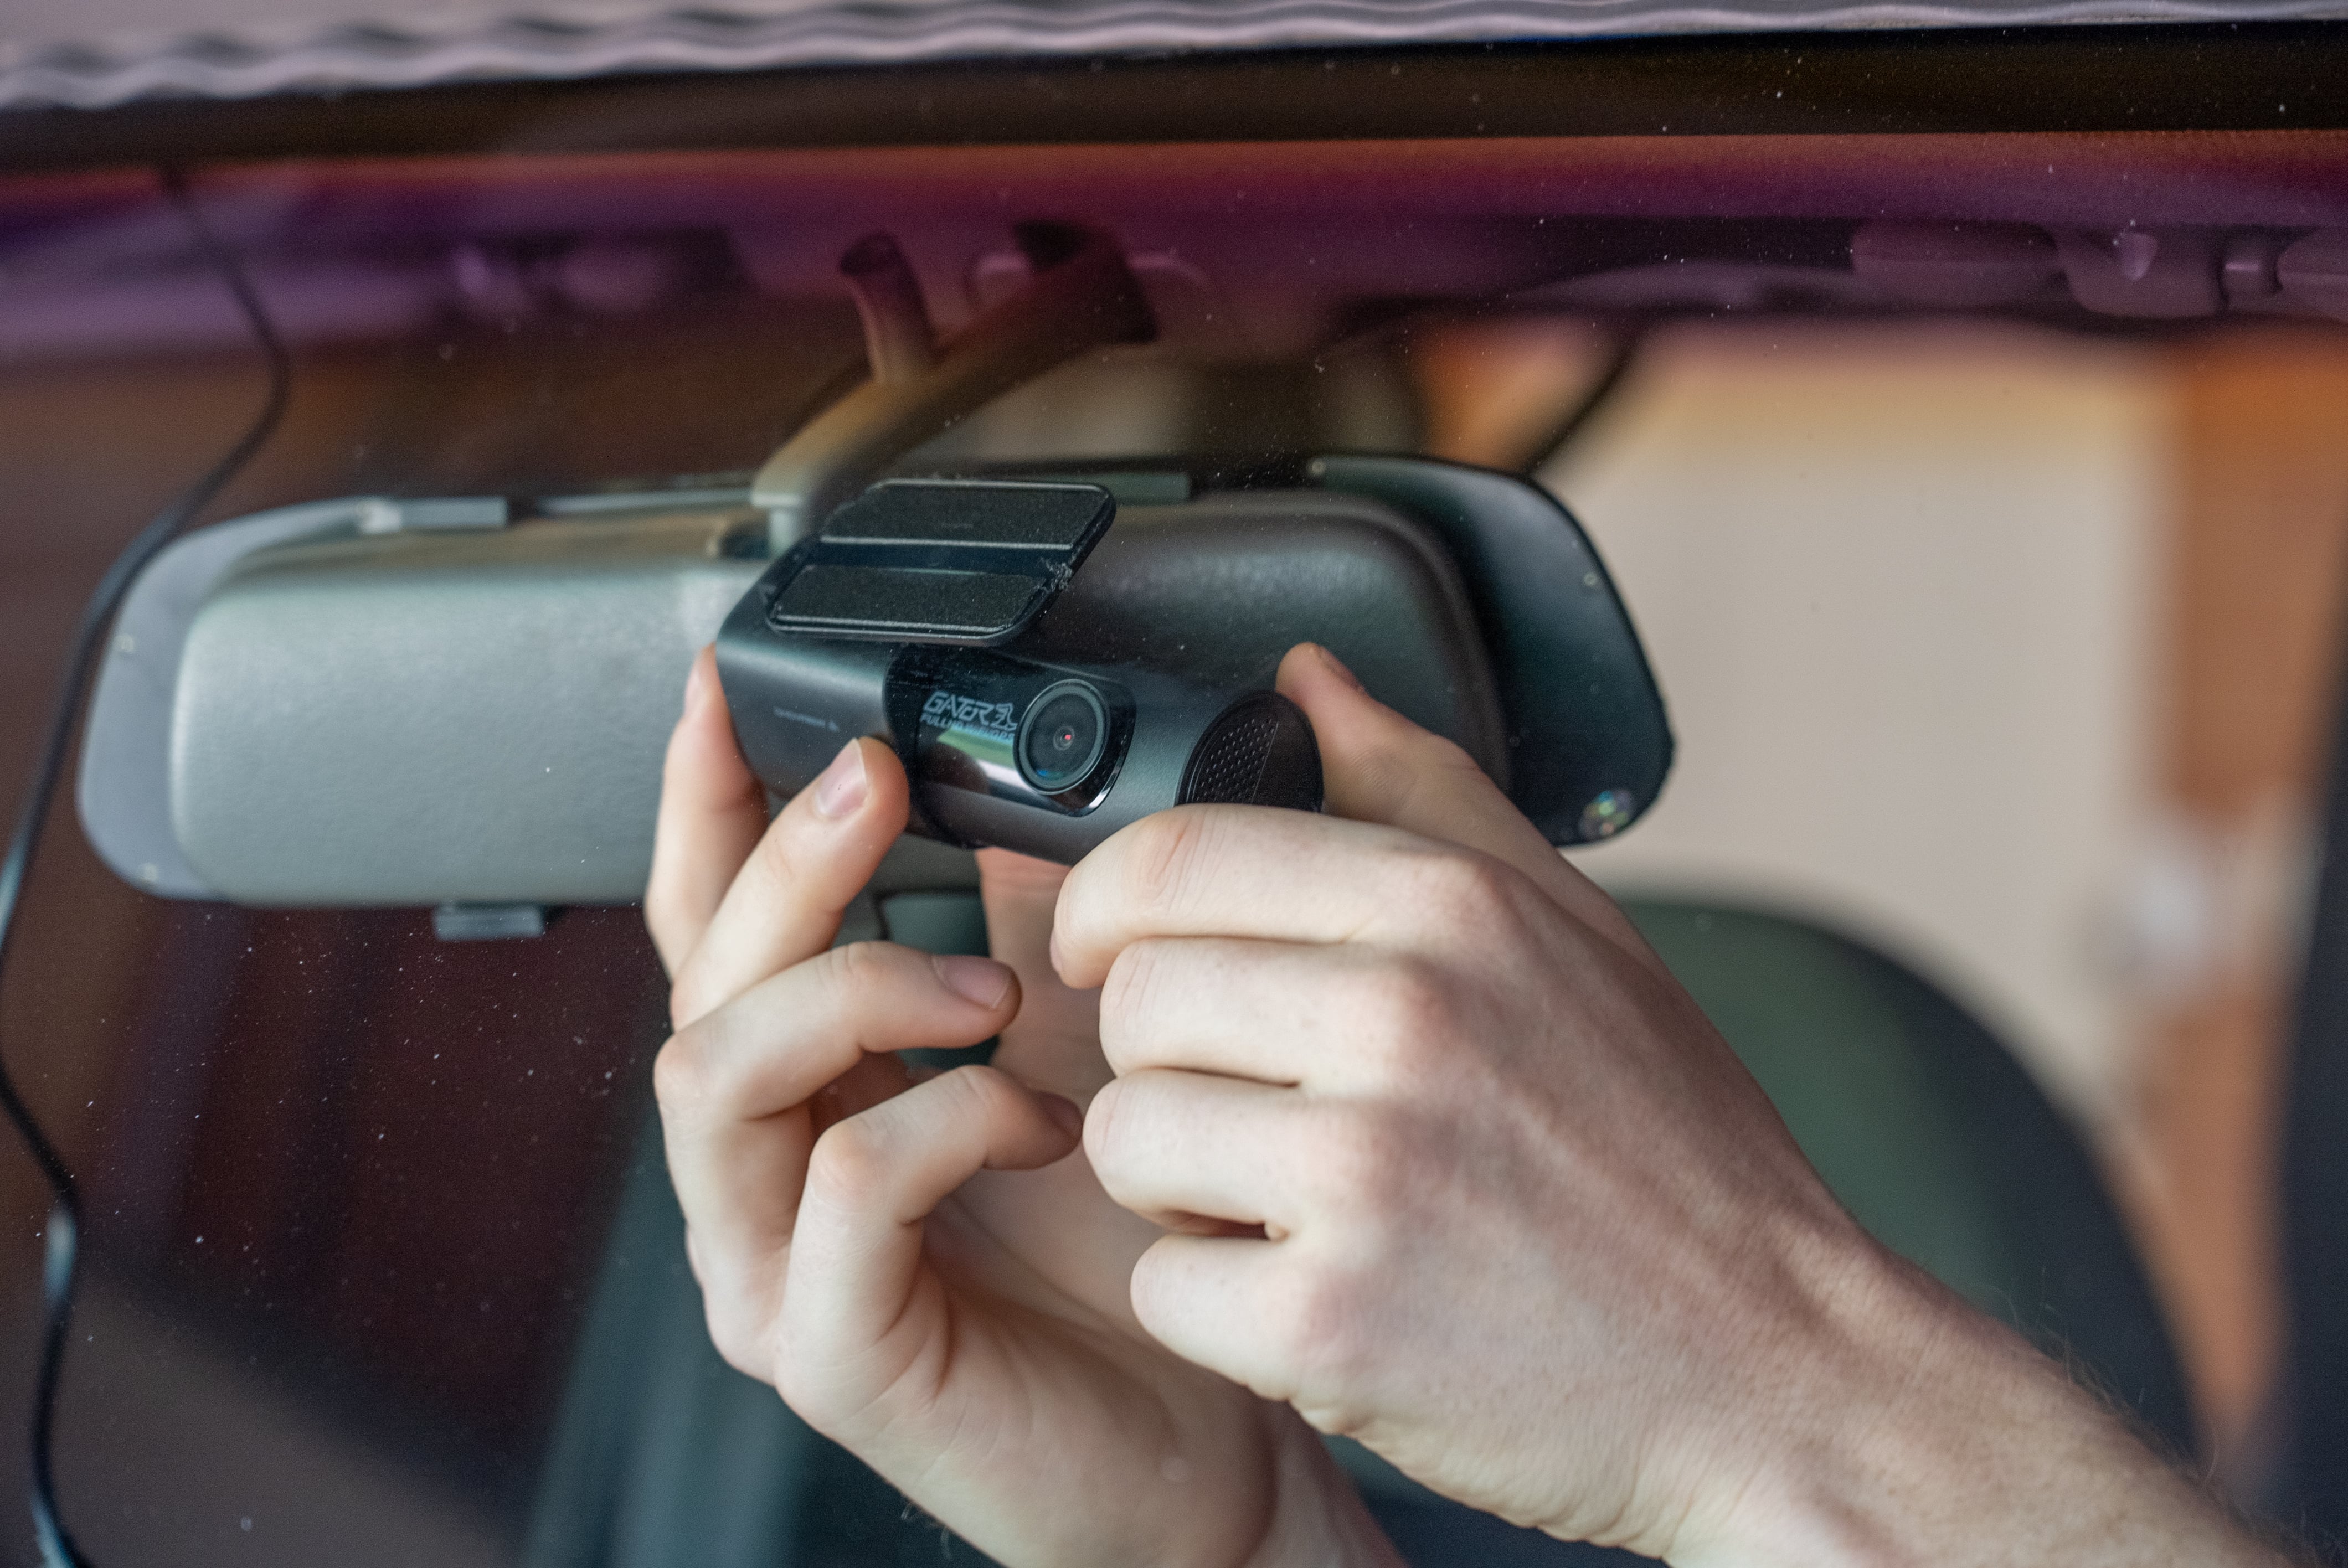
Choose a mounting location
To ensure a clear view for you AND the camera, behind the rear-view mirror is a
perfect mounting location. If you’ve chosen a model with a rear facing cabin camera, just ensure
the mirror won’t obscure the rear facing lens.
Also ensure the windscreen wipers will clear the rain where your camera is mounted, lest you
wind up with a 3 hour video of raindrops.
How to install a dash camera
Whether you’re using a suction cup or an adhesive mount, give your chosen area a
wipe with your clean cloth soaked in wax and grease remover; and that dash cam isn’t going
anywhere soon.
Be sure to test the wax and grease remover on an inconspicuous area first, to confirm that the
cleaner won’t discolour your dash.
How to install dash cam wiring
Dash cam wiring is easy. Plug your camera in and route the wire across the top of
the windscreen, tucking it into the headliner.
Tuck it behind the A pillar, along underneath the dash; across to your twelve-volt socket. Done!
Your camera will power up and shut off with your vehicle ignition.

How to hardwire dash cam
If you’re hardwiring your dash camera, the cable which came with the camera won’t be required. Plug in the dash camera hard wiring kit and run the cable as you would in step 3, but this time head for the fuse block.
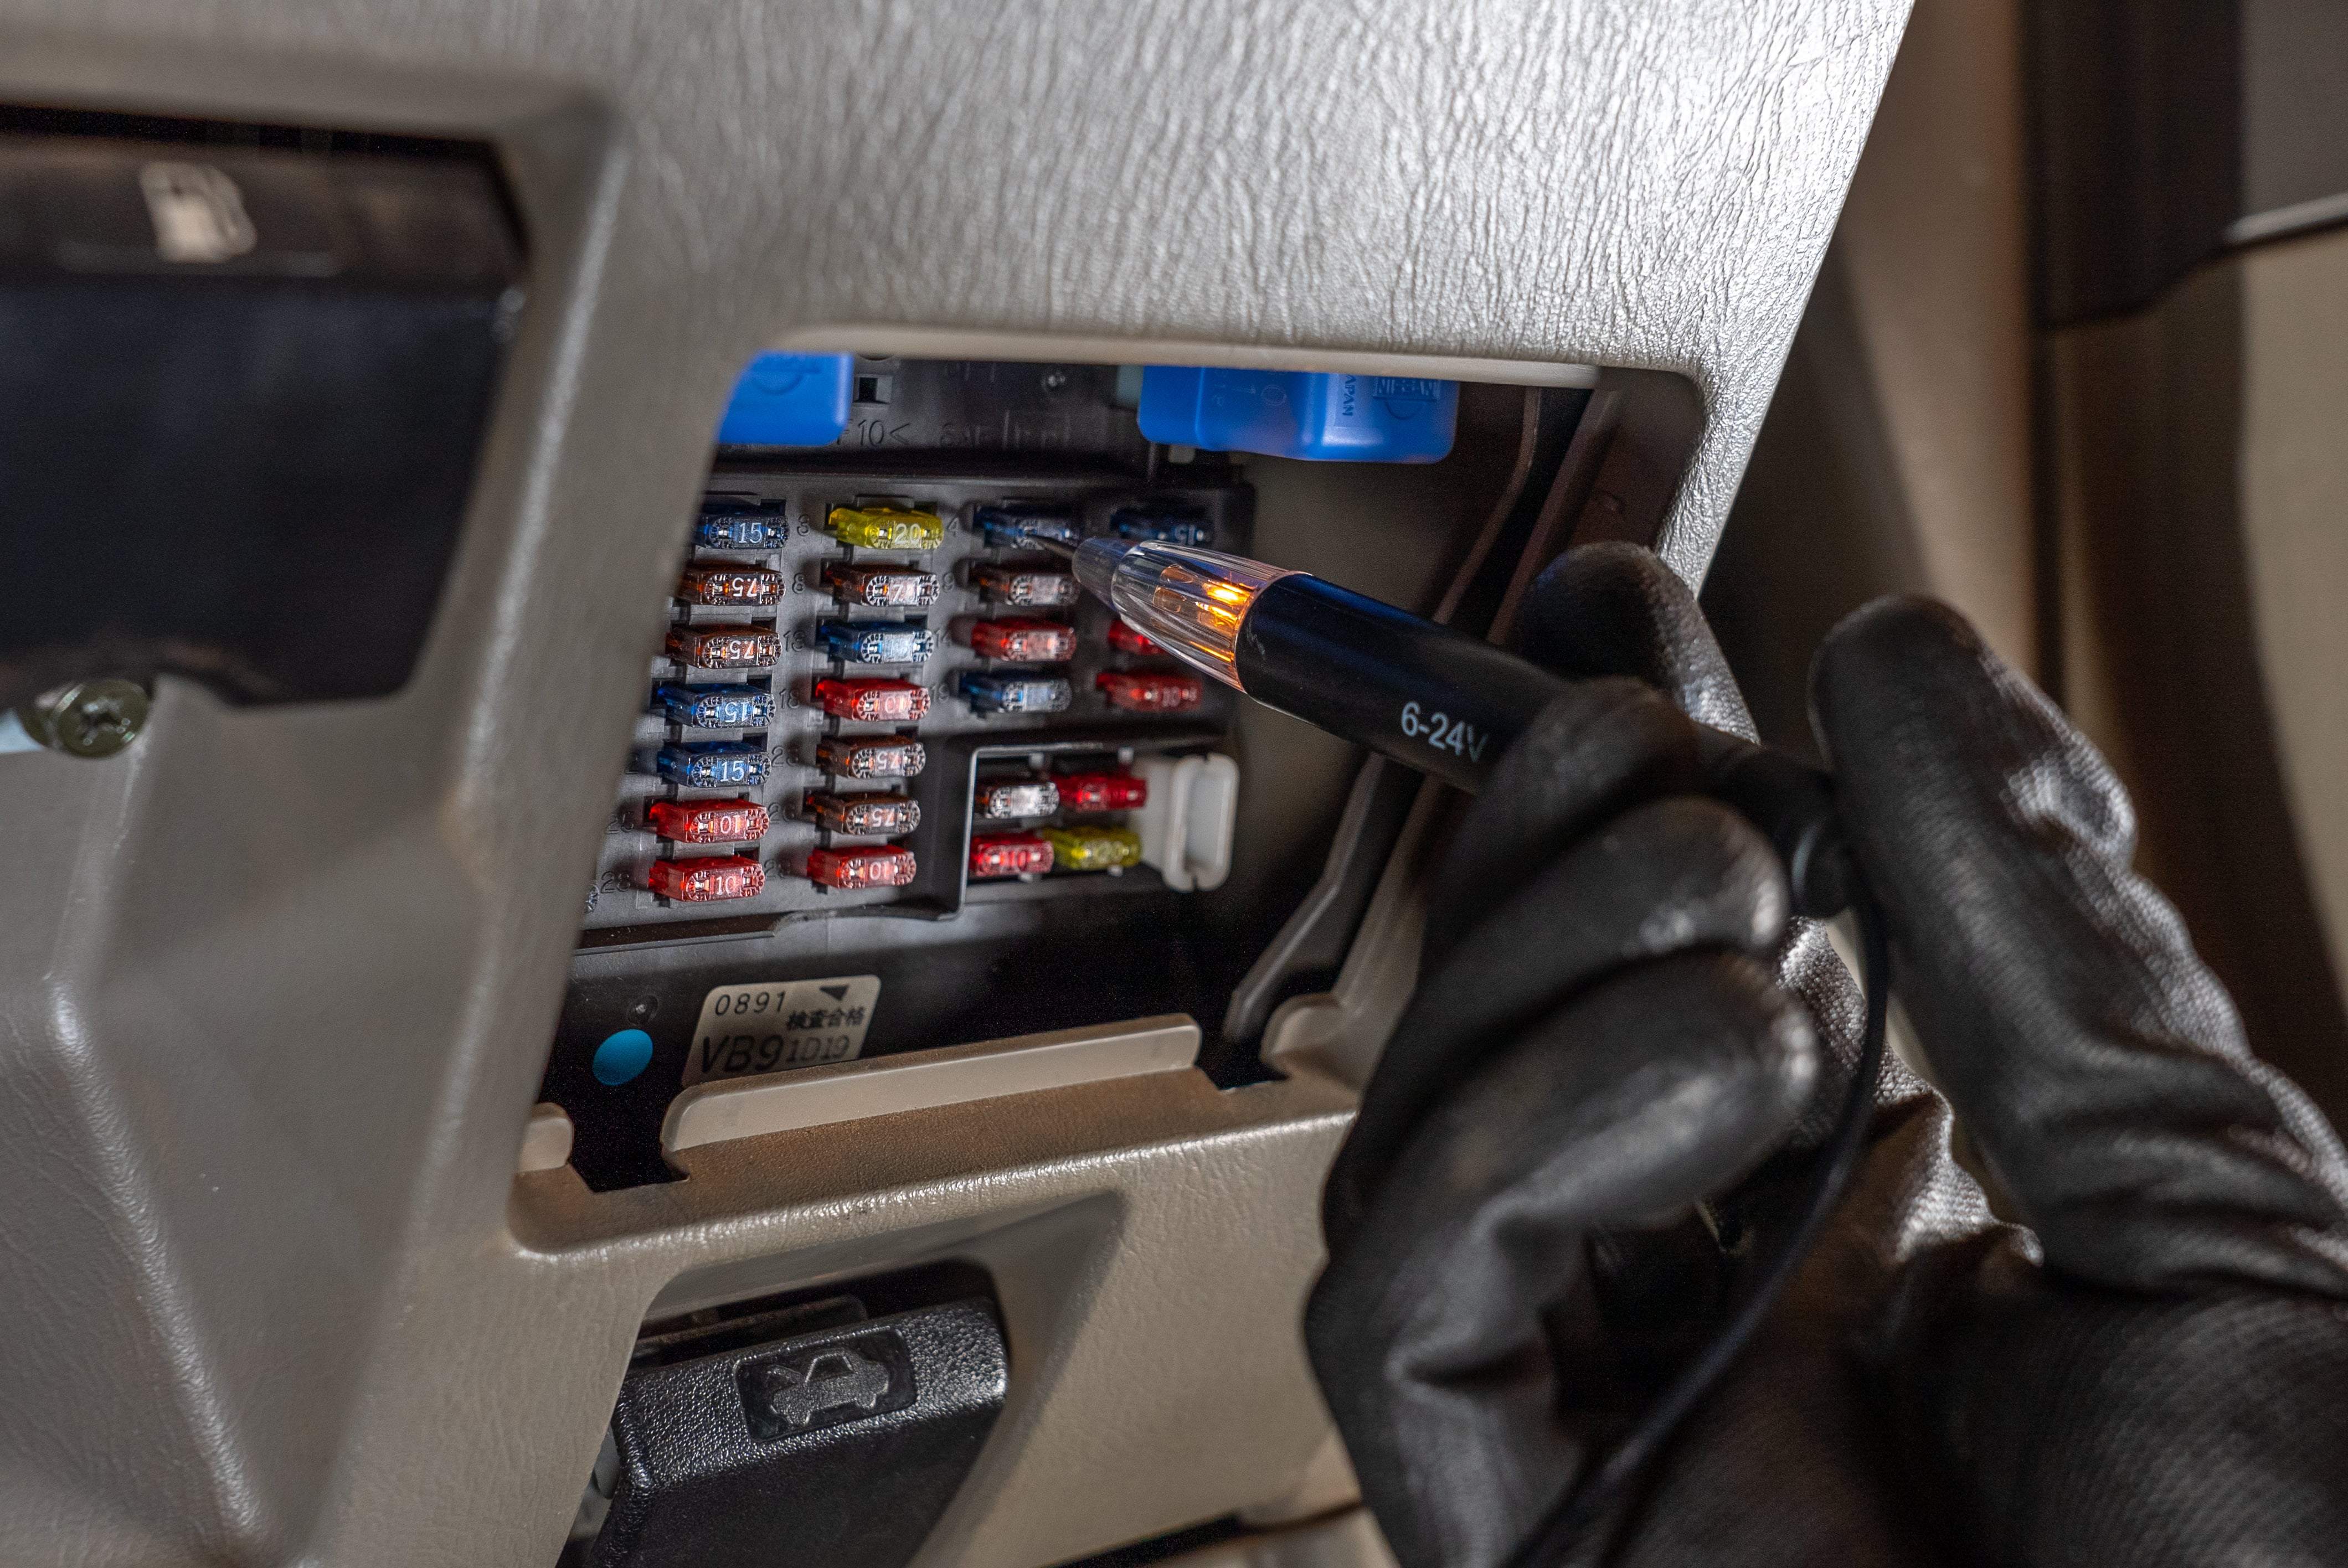
Find a power source
Consult the owner’s manual for your dash camera or hard wire kit to determine
whether you require a constant, ignition, or accessories power source. Then locate a suitable
earth point under your dash and clip the test light to this.
Turn the ignition on and probe the fuses until the test light illuminates, then turn the
ignition or accessories off to confirm whether it is constant or switched.
Complete your dash camera hard wiring
Remove the fuse you located in step 5, slot a fuse adaptor in; and replace the
fuse you removed into the adaptor.
Attach the negative terminal on your hard wire kit to that earth point you just used, and your
dash camera hard wiring is complete. No cutting, no soldering. SUPER!

Tips & FAQs
What are the benefits of installing a dash camera in my vehicle?
Installing a dash camera will provide you with a source of evidence should you run into trouble on the road, in a car park, or if you are the victim of theft or vandalism. Evidence from your dash camera can speed up an insurance claim or assist police.
Purchasing a high-end dash camera may provide advanced features beyond evidence collection such lane departure and collision warning or safety camera updates. These modern functions will bring increased safety to your older vehicle.
Can I install a dash camera in any type of vehicle?
In short, yes! A dash camera can be installed in any type of vehicle, though you may encounter limitations if your vehicle uses a voltage different to the common twelve volt. Most cars use twelve-volt electrics, though many trucks and some four-wheel drives rely on 24 volt electrics. If you have a 24-volt vehicle, be sure to check that the dash camera you are considering is compatible with this.
Can I install a dash camera on my own, or do I need professional assistance?
A dash cam installation is SUPER simple, as a plug and play setup is well within the reach of most people. A hard-wired dash camera installation is a little more involved, though with a few basic tools and a little more time; most people won’t have a problem.
Fortunately, if DIY isn’t your thing; the simple nature of dash camera installation means that finding a professional to do the job should be easy and relatively inexpensive.
*Important information* - Click here to read more about our DIY Advice Terms and Conditions.